Hey crafters! Curious to learn “how to upload fonts to Cricut“? So, let’s get straight into the correct process of uploading fonts to Cricut Design Space. If you try to upload your file directly to Design Space, you will be notified with an error message, “Wrong file type,” no matter how many times you try.
If you’re unfamiliar with uploading fonts to Design Space and want a walk-through guide, check out this post.
Note: If you want to use most Cricut fonts, you must buy Cricut Access. Even after getting Cricut Access, Cricut sometimes wants you to pay for a particular font or file.
Key Points to Consider Before Uploading Fonts
Let’s assume you’re new to uploading fonts to Cricut Design Space and don’t know where to begin. Don’t worry; we have got you covered. You can follow this full step-by-step guide for a successful font upload in Design Space.
Note: The process may vary depending on the browser or device you are using:
- Remember to close your Cricut Design Space when installing new fonts. If you open your software when you upload your new font, it won’t show up in the software.
- Save your project before you quit the Cricut Design Space application, as it doesn’t have the auto-save feature.
- If you’re using a Windows or Mac computer, please pay attention to where your font downloads are located.
- Make sure you download fonts using Google Chrome, which works great with Design Space.
How to Upload Fonts to Cricut: 5 Simple Steps
Here are the steps to upload fonts to the Cricut Design Space software with different methods:
Step 1: Find and Download the Font
- Find your desired font file, either TTF or OTF, from any free or paid font websites.
- Download the font file to your computer.

- Then, click on the little arrow in the box and select Open.
Tip: To get the premium subscription to your newly downloaded file, drag it onto your desktop.
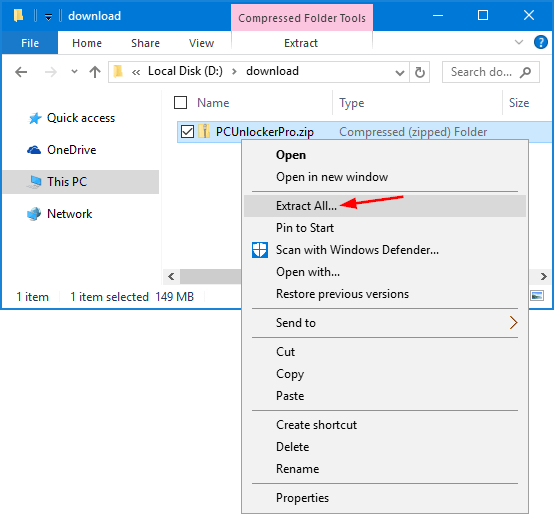
Step 2: Open the Zip (Unzip the Font File)
Fonts are zipped together, so you first need to extract the files. Follow the instructions given below to do that:
- When you tap Open on your downloaded font in Google Chrome, as instructed in the step above, you must go to the font folder in your Windows File Manager.
- If your font files are zipped, unzip them by right-clicking the .zip folder.
- Then click Extract All.
Step 3: Install the Font File
Method 1: For a Windows computer, you can:
- Right-click the .ttf or .otf file to open it.
- Now, find the “Install” or “Install Font” option from the menu that pops up on your display screen.

Method 2: You can also copy/paste them into your computer’s font folder. It can be accessed by the process instructed below:
- Go to the Start menu of your computer.
- After that, go to the Control Panel.
- Then, move to Appearance and themes.
- Click on Fonts and simply copy and paste the file into the folder.
Congratulations! Your font has been successfully installed on your computer.
Step 4: Upload Your Font to Cricut Design Space
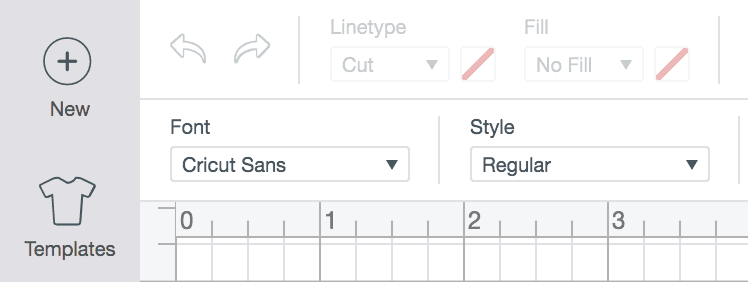
- Launch your Design Space and click on New Project.
- Reload the Design Space before you try to find the font.
- Then, click on the Refresh icon in the upper left corner.
Step 5: Tap on the Font Dropdown Menu
- Once your app is reloaded, tap on the “Text” tool on the left-hand side of the toolbar.
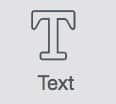
- Next, click anywhere on the Cricut Design Space to create a blank Text box.
- When you select the text tool, the default font and a dropdown arrow will open at the top of the screen.
- Click on the Font dropdown menu, and you will see a selection of fonts.
- You will get three options to choose from: All, System, and Cricut. Click All.
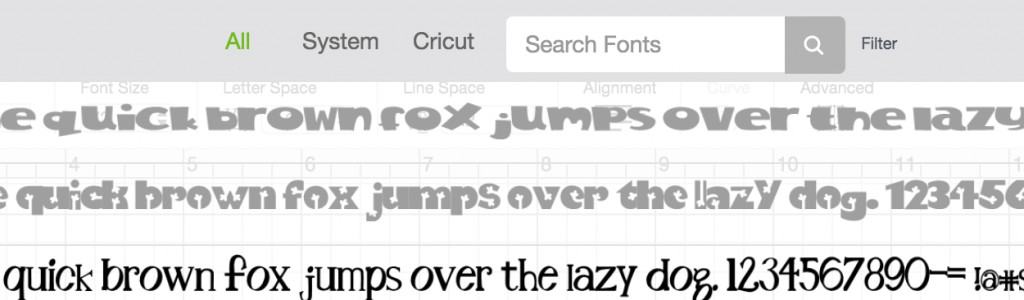
- A list of all available fonts, including Cricut and system fonts, will be displayed.
- Find your newly installed font in the list and select it.
Using System Fonts in Cricut Design Space
When you select “System Fonts,” you’ll see everything that you have installed on your computer.

- The app will automatically recognize and display the fonts you have installed on your system.
- You can then use these fonts in your designs just like you would use any other font.
And that’s it! It’s really quite simple once you know what to do.
Troubleshooting Steps for Font Upload Issues
You can try these additional steps if you’re not able to see the downloaded font:
- Restart the application if the font you just installed doesn’t appear.
- Make sure your font is installed properly on your computer.
- You cannot directly drag and drop the .zip file into your system’s font folder because it needs to be unzipped first.
- Use the search bar in Cricut Design Space to find the specific font.
- If you’re still having trouble, try to sign out of Cricut Design Space, then sign back in and refresh your account to resolve the issue.
Frequently Asked Questions (FAQs)
How Do I Add Downloaded Fonts to Cricut on iPhone?
First, download the third-party font app like iFont, then follow the instructions listed below:
- Download the font file to your iPhone’s Files app.
- Select and install the downloaded font file (usually a zip file).
- Open the “Cricut Design Space App” and click on the Text tool.
- Go to the “Font” tab in the Edit panel.
Your newly installed font should be listed under “System Font.” Enjoy it!
Can you use your own font with Cricut?
Yes, you can use your own fonts in Cricut Design Space, but you won’t “Upload” them in the traditional sense. Instead, you’ll need to install the fonts on your computer/Mac, and then Cricut Design Space will recognize them as “System fonts.” Choose your desired font from the list and start typing. Your font will be used in Cricut Design Space.
Are all Cricut fonts free to use?
While many fonts are free to use, you can’t use all the fonts for free in “Cricut Design Space“. A subscription to Cricut Access grants access to a wide variety of fonts, images, and projects. Some of the premium fonts, particularly those with specific licenses, may be purchased separately. Fonts with a green icon are a part of Cricut Access. Fonts that are free and not part of the premium plan will not have a price when you select them.
To see your free fonts, use the Filter icon in the fonts menu and turn on the “Purchased” filter.