Do you want to learn about Cricut Joy set up? If yes, then you are in the right place. In this blog, I will share my personal experience setting up a Cricut cutting machine. You will be amazed by the quick and easy steps to set up a Cricut machine. I also installed Cricut, and so far, I have set up multiple tools such as Cricut Explore, Maker, and Joy.
Setting up the Cricut machine is always fun. With this tutorial, I will take you on my journey. By the end of this post, you will learn how to setup Cricut Joy stepwise. Make sure you have a compatible device to set up your Cricut. If you are unsure about the setup process, you need to check your system compatibility, as I have already explained in this blog. The following steps will be for PC users only.
Step 1: Checking System Compatibility
Before you learn how to perform Cricut Joy set up, you must check whether your computer or other device is capable of running Cricut Design Space. If not, you must try to arrange such a device that is at least compatible with Cricut. Below, I have listed some points that you can check to confirm whether your PC meets the required system requirements.
Here are the PC’s system requirements you need to check:
- Operating System – Windows 10 or later (64-bit)
- RAM – Minimum 4 GB
- Disk – 2 GB free
- CPU – Intel Dual Core or equivalent to AMD processor
- Display – Minimum 1024px x 768px screen resolution
- System Connectivity: A USB cord or Bluetooth connection
Step 2: Downloading the Cricut Application
Since the Cricut Joy set up will take place on the Cricut software, you must download it to your PC. If you have already installed a Cricut Design Space on your Mac, then you can leave this step and go ahead to the next one. If not, learn how to download and install the Cricut app. Here’s how to download the software:
- First of all, open a browser on your PC and visit the URL design.cricut.com.
- Once you land on the page, you will notice a Cricut download page pops up.
- On this page, you have to first select the checkbox indicating Cricut Terms of Use and Privacy Policy.
- After that, you have to select Download, and you will notice a slight change on your screen, which may differ on different browsers.

- Once you have downloaded the software, you must go to the folder where the downloaded file was saved.

- There, you have to look for the file that you downloaded and then double-click on it.

- Then, it will start installing your software. Before you install, you will be prompted to select the No and Yes options, confirming whether you trust the application source or not.
- Once you’ve done this, you need to open the software and start creating your Cricut ID. I already explained this in the next step.

Step 3: Creating a Cricut Account
A Cricut account is a must to authenticate you as a user in an app. The software may require you to log in for several reasons, such as security, functionality, and marketing. So, let’s take a look at the following steps to create a Cricut account:
- Open a browser on your PC and visit cricut.com/setup.
- Now, you have to select Get Started at the bottom of your screen.
- Then, you will want to create a Cricut ID by filling in your first and last name and email address and choosing your country.

- After that, you have to read all the Cricut Terms of Use and tick the box to accept them.
- Once done, you will need to click on Create User ID.
- Finally, you will see the confirmation message on your screen. Click continue and fill in the further details.
Step 4: Cricut Joy Set Up
Once you have created your Cricut ID, you will need to proceed and set up your machine. Here’s how to set up Cricut Joy on a PC:
- Go to your Cricut Design Space software on your PC.
- Then, you need to select Product Setup.
- After that, you have to select a Smart Cutting Machine.
- Now, you should select your Cricut model.

Step 5: Add Cricut Joy to Your Windows PC
This is the last step, and you will have to connect your Cricut machine to your PC via Bluetooth. Below, I will explain the steps for Bluetooth connection only. For USB cords, you can simply insert them into the USB port.
Here’s how to add a Cricut cutting machine to your PC using Bluetooth:
- Turn on your Cricut product as well as your PC.
- Then, you have to keep your PC and Cricut close to each other.
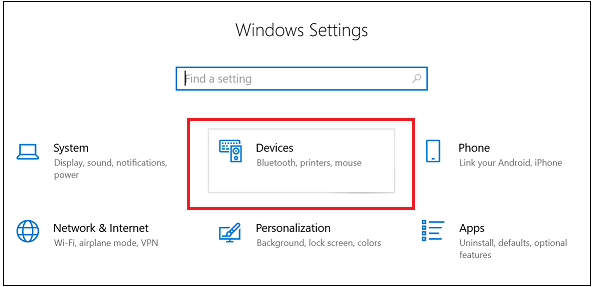
- After that, go to your PC’s Settings > Devices.
- Next, you will need to turn on your Bluetooth.
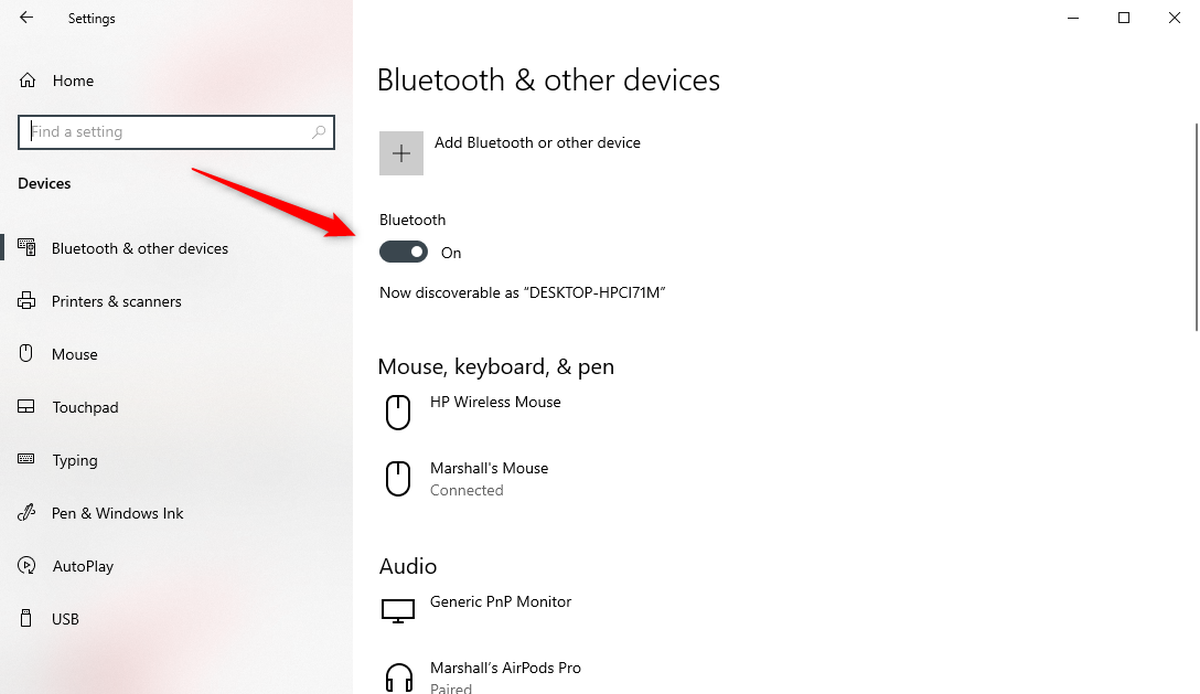
- Once done, you have to add your Cricut machine.
- Now, complete the pairing, and you will be done with your Cricut Joy set up.
FAQs
Question 1: What should I have to set up my Cricut Joy?
Answer: Setting up the Cricut product is a breeze, and you will need some essential items and accessories before setting up. Below, I have listed some of the items; let’s take a look below:
- Cricut machine
- USB cable or Bluetooth built-in
- Compatible devices such as Windows/Mac/Android/iOS
- Internet connection
Question 2: How to connect Cricut Joy using a USB cord?
Answer: No, you can’t connect your Cricut Joy machine to your PC with USB. The reason is that this machine doesn’t have a USB port, so it can only be connected via Bluetooth. So, make sure you have a system with built-in Bluetooth to connect the Cricut machine to your compatible system.
Question 3: What comes in the box with Cricut Joy?
Answer: In the box of the Cricut machine, you will receive the following items:
- Cricut Joy machine
- Blade + Blade Housing (pre-installed in a machine)
- Fine-point pen (Black)
- Welcome card
- Free 30-day trial to Cricut Access
- StandardGrip mat, 4.5 in x 6.5 in
- 50 ready-to-make projects online
- Materials for a practice cut
- Power adapter