Whether you are upgrading or purchasing a Cricut Explore 3 and eager to start your craft projects, you are at the right place. If you are new to the setup process and want to avoid spending hours setting up your new machine—do not worry; I am here to help you with this guide on ‘how to setup Cricut Explore 3‘.
This guide will walk you through everything you need to know about, starting from unboxing and connecting your machine to the Cricut Design Space app. Whether you are a beginner or a Cricut user, you can use this machine to bring your ideas to real life. Let’s dive into the blog and explore all about this innovative and smart cutting machine.
What Is Cricut Design Space?
Before setting up your crating machine, it is essential to know about the Design Space app used to control the machine. Cricut Design Space is essential software that you are required to use for the machine. You can create, upload, and send the design to the machine for cutting. The software is available for Windows, Mac, Android, and iPhone.
How to Setup Cricut Explore 3?
Setting up your crafting machine is a simple process, but you need to make sure that you follow every step. Follow the below steps, which will help you to set up your machine:
Step 1: Unboxing Your Machine
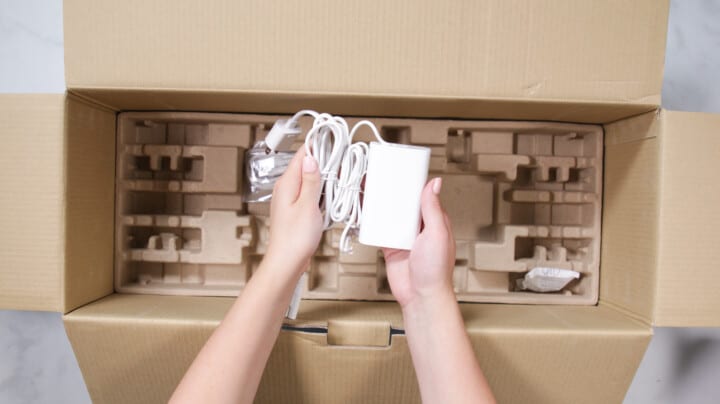
Before setting up the machine, the very first thing you have to do is take your machine out of the box and remove all the supplies and tools. Here are some of the basic supplies and tools you need:
- Cricut Explore 3 machine
- Power cord
- USB cable
- A sample material or cardstock
- Cutting mats
- Cricut pens and markers
- Weeder and scraper
- Transfer tape
Step 2: Plug in the Machine
Once you have unboxed the machine, place it on a stable surface with enough space for all materials.
- First, take out your power cord and plug one end into your machine.
- Then, plug the other end of the cord into a power outlet.
- Now, hit the power button on the front of the machine.
Step 3: Connect Cricut to Your System

Now, you are at the most important step of the setup process, which is how to set up a Cricut Explore 3. You can connect your machine using Bluetooth or via a USB cable.
Option 1: Using Bluetooth
- First, go to your computer and enable the Bluetooth option.
- Then, open the Cricut Design Space and log in to your Cricut account with your ID and password.
- In the app, go to your Device section and choose Explore 3 from the list of available materials.
- Afterward, hit the Pair option, and once your machine is paired, you will be ready to send projects to your machine wirelessly.
Option 2: With a USB Cable
If you are looking for a wired connection, then use the USB that comes with the machine. Follow the below steps to do so:
- To begin, open your computer and connect the USB cable to your computer and the other end to Cricut’s port.
- Now, open the Design Space app and make sure the machine is on. The Power button should be flashing in white.
- The PC will detect your machine and connect automatically.
Step 4: Download Design Space Software
After setting up the machine, it is time for you to understand how to use it. To use this machine, you need to download the Cricut Design Space app on your PC because, without it, you cannot operate this machine and use it for your crafting process. The app is free, and it allows you to create, customize, and send projects to the machine for cutting. Follow the below steps for installing the app:
- Go to your browser and search for the official website of Cricut or Cricut.com/setup.
- Then, navigate to the Download section and hit it.
- After that, agree to all the terms and conditions.
- Now, double-click on the downloaded folder to install it.
- Suppose a window appears asking if you trust the application. Hit the Yesbutton.
- Next, sign in with your ID and password.
- At last, the Cricut Design Space icon will be added to your desktop.
Conclusion
In conclusion, Cricut Explore 3 is a user-friendly and smart cutting machine that can be used by beginners. Its fast setup and ability to cut different kinds of materials make it an ideal cutting machine for anyone who is looking to try their hand at crafting.
Whether you are making cards, t-shirts, or other craft projects, it can cut every material from the thinnest to the thickest with its sharp-edge blades and tools. With the help of this guide on how to setup a Cricut Explore 3, you can easily set up your machine. Once your machine is set up, you can explore its full potential to customize your projects.
Frequently Asked Questions (FAQs)
What Materials Come With Cricut Explore 3?
When you purchase an Explore 3 machine, you get all the other materials and accessories with it. Read the below list to know all about it:
- Cricut Explore 3 machine
- Premium fine-point blade and blade housing (Pre-installed in the b clamp)
- Quick start guide
- USB cable
- Power adapter and power cord
- Sample materials for cutting
What Projects Can I Make With Cricut Explore 3?
The crafting machine can cut 100 different materials, and you can make such different kinds of projects with the Cricut Explore 3, including:
- Stickers for gifts, organization, and decor
- Make labels for jars and spice racks
- Vinyl decals for wooden signs or posters
- Personalized apparel and t-shirts
- Banners
- Mugs
- Leather earrings
- Tumblers
- Cupcake topper
- Pillow cover
Is Cricut Explore 3 Worth Buying?
Yes, the Explore 3 is worth buying if you want a smart cutting machine for diverse projects or to upgrade your current device. The machine offers you good speed and ultimate precision when cutting materials, and it can cut from thick to thickest material with its sharp edge blades and tools. Also, it is faster than its predecessor.